How to assign your RowShare rows?
RowShare permissions are based on an innovative concept: each row is owned either by a user or by a group of users. If you create a row, it's yours until it's assigned to someone else. Unless a table…
RowShare permissions are based on an innovative concept: each row is owned either by a user or by a group of users. If you create a row, it's yours until it's assigned to someone else.
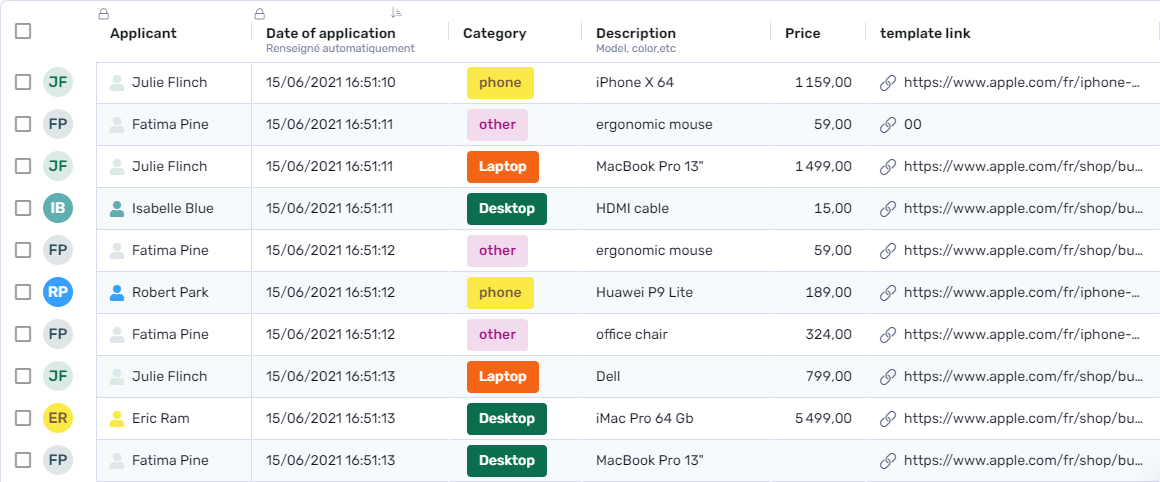
Unless a table admin decides to hide it, a colored circle indicates its owner at the beginning of each row.

In this screen capture, you can see that the row owner is not only identified by the colored circle, but also by columns of type Row owner and Row owner email. You can add these columns to any of your tables. They automatically reflect the row owner.
You can share your table without restrictions or limitations. However, if you wish to limit read and write options for any part or all your table, you can edit the permissions and, if you wish, assign rows to the people of your choice.
When you share a RowShare table, you decide if your co-workers can see all the rows or only theirs, and if they can edit the ones they do not own.
Assign Rows
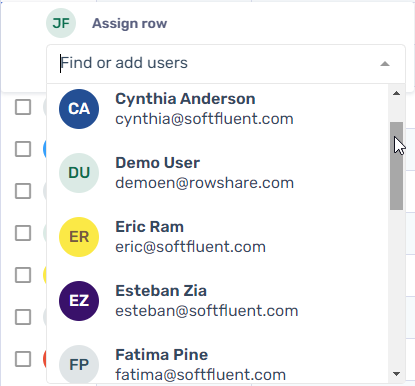
To assign a row, first do one of the following:
- double click on the colored circle at the beginning of a row
- select one or several rows by clicking on the checkbox to its left, then click on Assign on the blue toolbar above the table
- double click in the Row owner or Row owner email column (if the table has such columns), or
Then enter the email or choose the user or the group of users you want to assign the row to.
The new row owner(s) will be notified by email, and if they have permissions only on their own rows, they instantly get access to this row.

Hide Row Owner Initials
If you don't want each user to know who owns each other row, click on Settings in the table menu, and uncheck "Row Oner Initials". Of course, do not include Row Owner or Row Owner Email columns in your table.

How did we do?
How to share your RowShare tables?
Control who can access specific columns