Table of Contents
How to invite and manage your RowShare users?
The users of your subscription are listed in its settings. Once users are enrolled in your subscription, you can give them access to some of your tables. Subscription admins have a Settings button on…
The users of your subscription are listed in its settings. Once users are enrolled in your subscription, you can give them access to some of your tables.
Subscription admins have a Settings button on their RowShare homepage toolbar:
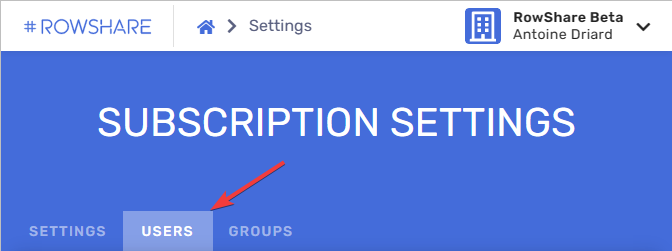
To manage users, click on the Users tab:
Add Users
If you're already using all your subscription paid users (as in the example below, 22 out of 22), you should start by extending your subscription, clicking on "Change Team Size".T
Then confirm your plan and update your user count.

Manage Users
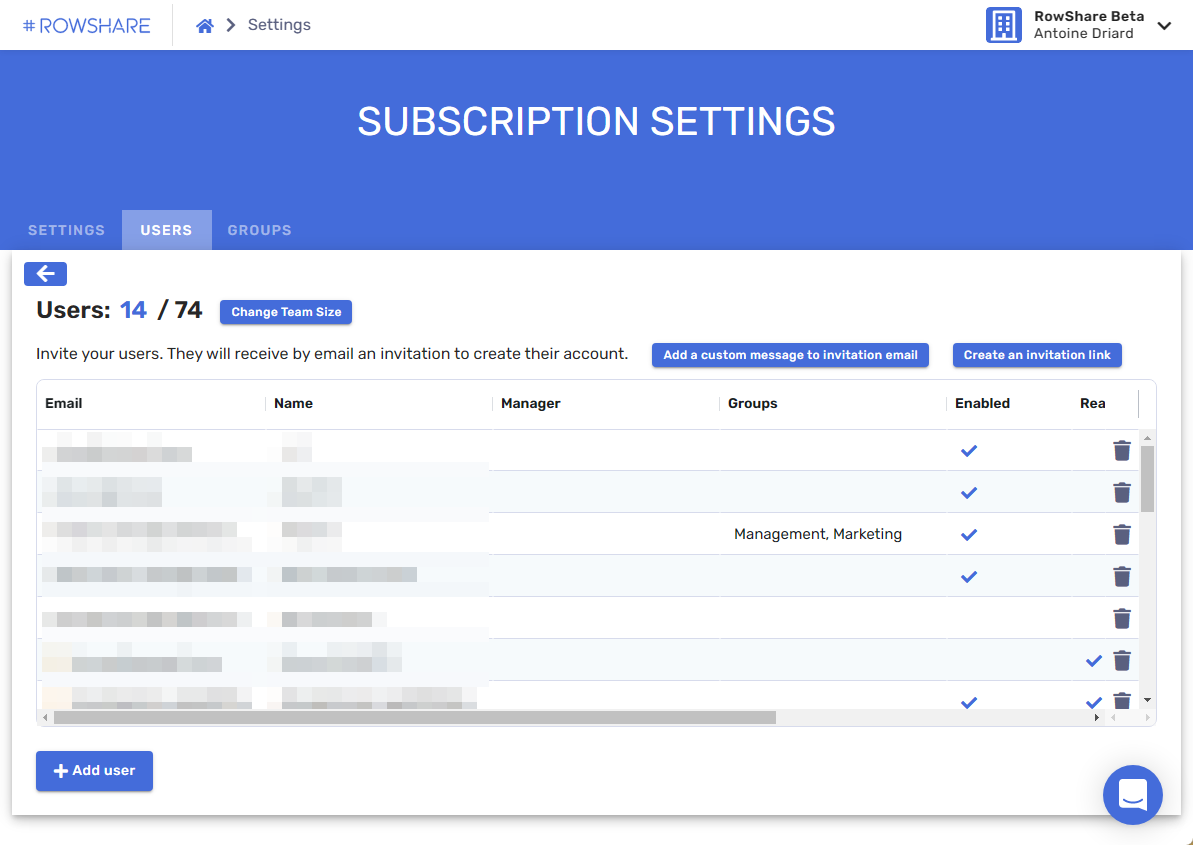
This is where you invite users, and edit their attributes as explained below.

You can also grow and shrink your team size, with the button next to the team size.
- Name: Regardless of the name users chose when they create their RowShare account, you define how they will be identified within your subscription.
- Email: This is the unique identifier of each user, it can't be changed. Once invited, they have to connect to RowShare with the same email. Otherwise they won’t be able to access your subscription.
- Manager: You can optionally define a manager for each member. If the Hierarchical rights are enabled (see the Settings paragraph in this page), this lets managers see their team data.
- Groups: Groups of users can have common access rights. A user can be part of as many groups as needed. See the Groups paragraph in this page for more information.
You can activate and deactivate members as needed. Deactivating a member removes his access to your subscription. You do not pay for inactive users.
Invite new Users
Before you grant someone permissions on a table, this person needs to join your subscription. There are two ways to invite someone to join your subscription:
- Add him/her to your user list
- Create and share an invitation link
Add users to your user list
Click on the button at the bottom left of your user list to add a new one. Just enter an email address and a name, and that's it! Added users will receive an invitation email.
Optionnally, you can add a custom message to these invitation emails by clicking on this button:

Your custom message will be added to our invitation email. It will be added to all future invitation emails until you delete or modify this welcome message.
Your users still have to signup to RowShare with the same email address you invited, and upon registration, they will automatically join your subscription.
If our invitation email doesn't make it to their inbox, not even their junk mail folder, you can guide your new users to our web site (www.rowshare.com). If they click on Free Trial and register with an email address you have invited, they will indeed join your subscription.
Share an invitation link
Sometimes you need to invite users but you don't know their email address. Maybe because they will forward it to someone else, or because you don't know which of their email addresses they will use. It could also be that you want any of your employees to be able to join, but you can't add all your employees to your RowShare subscription (it would take too much time and it would require to pay for all of them).
This is when you need our Invitation Link feature:

Click on this button, then on Create the invitation link, this is what you will get:

Copy this link, send it to the users you want to join your subscription. Anyone using this link will first have to sign up to RowShare, then will automatically be enrolled into your subscription even though you didn't explicitely add them to your user list.
When a user joins your subscription through this link, he/she is added automatically to your user list and you are notified by email (as well as all the other subscription admins, of course).
The invitation link works as long as you don't delete it and given that your subscription has enough available seats/users: if you pay for 5 users, when you have 5 active users, the invitation link will stop working. Disable or delete a user and the link will be fully functional again.
If things go out of control (too many people join your subscription), delete the link, create a new one and share it again. Or revert to the good old way of adding users one by one to your subscription.
User Roles
Special Access Roles
Users can also be granted additional roles:
- Super User: Gives access to all tables in the subscription with the same rights as the table owners.
- Administrators also have full permissions on all tables, and they can also access this Subscription Settings page, including billing information, adding and removing users... Admins also receive invoices by email. The user who creates a RowShare subscription is its first Administrator.
Read-Only Users
Read-only users can access your subscription and browse the tables as any other user. There are two critical differences between read-only and regular users:
- Obviously, they can't write! Regardless of the access rights set on a table, their access to the subscription tables is always read-only.
- You can add more read-only users than your subscription user limit: they are free and unlimited.
Groups
Create groups, then assign groups to your users. This lets you share tables with groups instead of individual users and even assign rows to groups.
Groups simplify the management of folders and tables access rights.You can create groups as needed, such as Management, Marketing, Finance, HR, etc. If you would like to further refine your groups, create subgroups.
Users can be assigned to groups in the Users tab.
How did we do?
How do I edit my RowShare subscription options?
How to manage your subscription?