Table of Contents
Excel Sync: Edit a RowShare Table in Microsoft Excel
This feature is no longer supported by Microsoft and may stop working overnight without notice. It is replaced by Excel import. What is it and why would I need it? Not only RowShare lets you import a…

What is it and why would I need it?
Not only RowShare lets you import and export Excel files, but it lets you edit (modify) a RowShare table from Excel! From any table, click on Excel in the action bar:
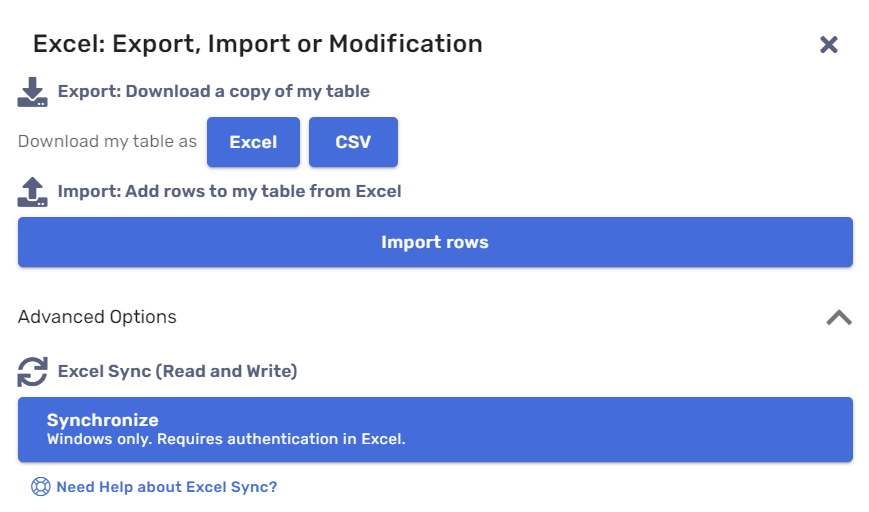
The top options are covered in other pages: Export to Excel and Import from Excel.
Click the 3rd option, Excel Sync, to edit your RowShare table directly in Excel and sync updates with RowShare. You will be allowed to see and modify rows and columns according to your RowShare permissions.
To get the best of both worlds, there are many benefits to editing a RowShare table in Excel:
- Gain offline access to RowShare
- Benefit from Excel analysis: charts, pivot tables...
- Use Excel unrivaled speed to edit hundreds or thousands of cells
- While benefiting from RowShare collaborative features (Access rights management, notifications, rich content…)
Getting started with Excel Sync
To edit your RowShare table from Excel, click on Excel above the table and choose the Excel sync option. Simply open the downloaded Excel file to begin synchronizing with RowShare.
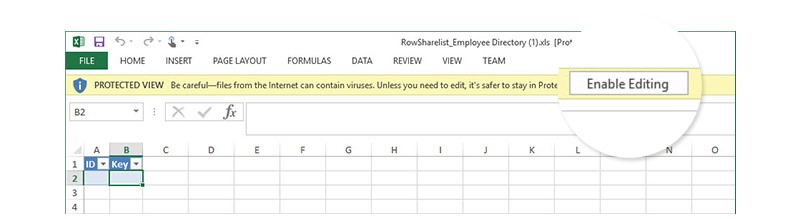
You need to login to RowShare within Excel. It is mandatory to allow Excel to make changes to your RowShare table. Once connected, Excel will remember you the next time.
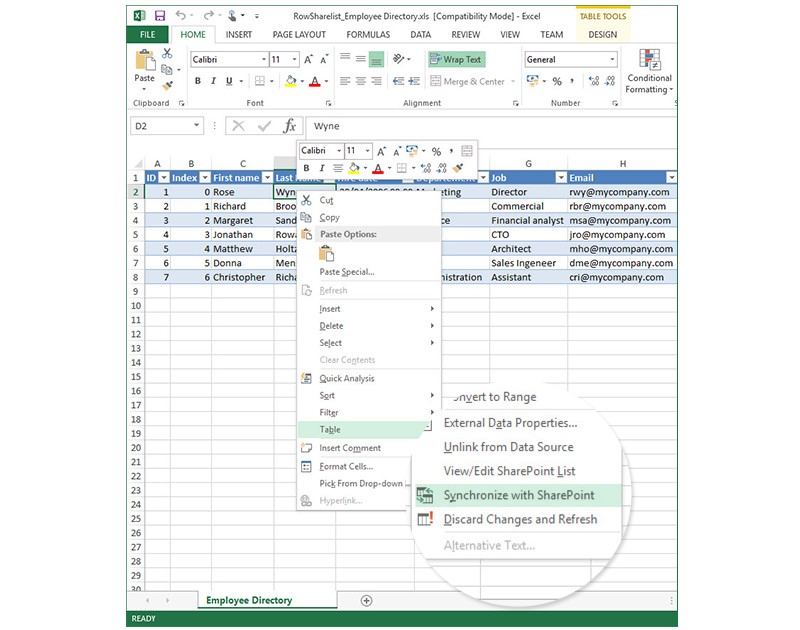
Excel then loads your RowShare table in the first tab of this new Excel file. Change your data as neeed, and when you're ready, to sync changes in RowShare and get the latest version of the table, right click on the Excel table and select Table > Synchronize with SharePoint from the menu.
You can edit data from Microsoft Excel even without an internet connection, although you will of course need to be back online to publish your changes to RowShare.
With two-way file synchronization, your RowShare table will be kept updated with any changes made in Excel, simply refresh the RowShare page to view changes made in Excel. If there are any conflicts, such as the same row having been edited in both RowShare and Excel, Excel will prompt the user to choose which version to keep.
Add Rows in Excel
Now that you know how to modify your RowShare data from Excel, you can even add new rows.
Insert rows
You need to manipulate the Excel “table”, not the whole Excel worksheet. This table is inside a blue rectangle in your Excel spreadsheet.
This means that you can’t right click on the row number (outside of the grid) to insert a row. You need to right-click in the table, then Insert / Table Rows Above.
Add as many rows as needed and synchronize your file back to RowShare.

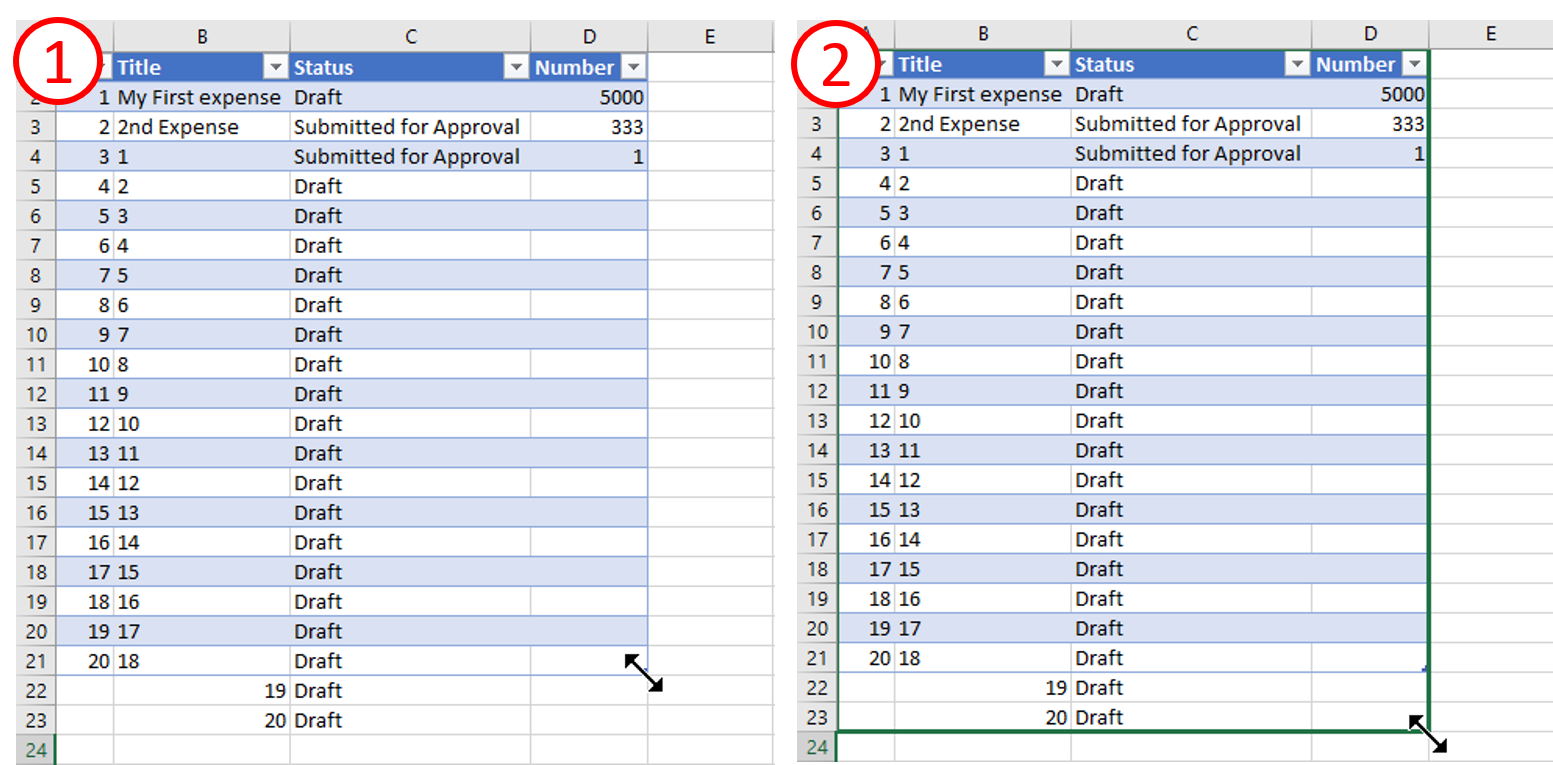
If you look closely, you will notice that in Excel your table is enclosed in a thin blue rectangle showing the boundaries of the table that is synchronized with RowShare. Anything outside this blue rectangle will not be sent to RowShare.
Add rows at the bottom
When you add rows immediately after the last row of your table, Excel will most often pick it up and extend the blue rectangle around your data. If it’s not the case, then you can extend it yourself by dragging its bottom right corner.
Known Limitations
Some columns are not fully supported by Excel Sync.
Lists of Options
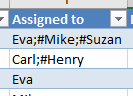
Microsoft Excel does not support drop down lists with multiple selection, so if your RowShare table includes multi-select lists, you will need to use a combination of special characters ;# (semicolon followed by the number sign) to separate the different values in Excel.

Your list will appear as follows in Excel:
Linked Lists
Dropdown lists linked to other tables are not supported in Excel. They should be considered as read-only in Excel.
Comments
Comments are not synced or even visible in Excel. Excel will only display a Comment count.
Files and Pictures
Given that Excel doesn't handle pictures and attachments correctly, it will be replaced by a link in Excel synchronized files. This information can't be changed in Excel.
Rich Text
When using Excel Sync, Rich Text columns are read-only in Excel.
Special Columns
Each RowShare table synchronized with Microsoft Excel has two additional columns: Id and Index. These are non-editable technical columns to identify rows during the synchronization process.
You can hide them in Excel, but you can’t delete them. The synchronization process would no longer work if these two columns were deleted.
How did we do?